How to Make a Curved Wooden Arch
To make a curved wooden arch, you will need the following materials: quality hardwood or plywood, a jigsaw or bandsaw, chisels, wood glue, clamps, sandpaper, a compass or flexible ruler, a pencil or chalk, safety goggles and gloves, and a measuring tape or ruler.
The process involves preparing and planning, choosing the right wood, drawing the curve, cutting the curve, refining the arch, laminating if required, fixing the arch, and adding finishing touches.
Safety should be prioritized throughout the process, and regular maintenance is necessary to check for stress or wear.
Proper sealing or finishing of the wood helps prevent moisture absorption and minimize warping or drying.
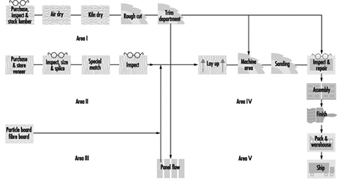
Check this out:
Did You Know?
1. The oldest known wooden arch in existence was discovered in Tel Rehov, Israel, and dates back over 2,300 years.
2. The process of creating a curved wooden arch is known as laminating, where multiple thin layers of wood are glued together and shaped using steam or heat.
3. In ancient Rome, curved wooden arches were often used in the construction of aqueducts to transport water over long distances.
4. The art of making curved wooden arches reached its peak during the Gothic architecture period in Europe, with intricate arches being used in cathedrals such as Notre-Dame de Paris and Chartres Cathedral.
5. The curvature of a wooden arch is carefully calculated to distribute weight evenly, allowing it to support heavy loads without collapsing. This engineering technique has been used for centuries and is still applied in modern architecture and construction.
Introduction To Curved Wooden Arches
Curved wooden arches have a rich historical significance, being used for centuries in various architectural, furniture, and home decor designs. Their presence adds an elegant and sophisticated touch to any space, while also serving functional purposes. Whether you are interested in incorporating a curved wooden arch into a doorway, window frame, or as a decorative element, this step-by-step guide will equip you with the essential information needed to successfully create one.
Materials Needed For Making Curved Wood Arches
To create a curved wooden arch, you will need the following materials:
- Quality hardwood or plywood: Choose durable and sturdy wood for the arch.
- Jigsaw or bandsaw: Use one of these tools to cut the wood into the desired shape.
- Chisels: These will be useful for fine-tuning the curves and removing excess material.
- Wood glue: Use a strong wood glue to secure the different pieces of the arch together.
- Clamps: Clamps will help hold the pieces in place while the glue dries.
- Sandpaper: Use sandpaper to smooth out any rough edges and achieve a polished finish.
- Compass or flexible ruler: This tool is necessary to accurately draw and measure the curves.
- Pencil or chalk: Use a pencil or chalk to mark the wood before cutting or shaping it.
- Safety goggles and gloves: Always prioritize safety and protect your eyes and hands while working with wood.
- Measuring tape or ruler: Use these tools to ensure precise measurements and alignment.
Having all of these materials at hand will allow you to efficiently and safely complete the curved wooden arch project.
Steps To Make A Curved Wood Arch
The process of making a curved wood arch involves several steps. First, it is essential to prepare and plan for the project. This includes determining the size and dimensions of the arch, considering the location and purpose of the arch, and visualizing the desired outcome.
Once the planning phase is complete, it is time to choose the right wood for the project. Hardwoods like oak or walnut are durable and beautiful but can be more challenging to curve. Alternatively, plywood or laminated veneers are easier to work with.
After choosing the wood, the next step is to draw the curve on the wood using a compass or flexible ruler and a pencil or chalk. This outline will serve as a guide for cutting the curve using a jigsaw or bandsaw. Carefully follow the drawn line, taking your time to ensure accuracy. Once the curve is cut, refine the arch using chisels and sandpaper to achieve a smooth and polished finish.
In some cases, laminating multiple thin layers of wood with wood glue may be necessary to add strength to the arch. This technique can be particularly useful when working with hardwoods that are difficult to curve. Use clamps to secure the laminated layers until the glue dries completely. Depending on the placement of the arch, additional wood pieces or screws may be required to fix and stabilize it.
Choosing The Right Wood For Curved Arches
When selecting the wood for your curved arch, it is crucial to consider both the aesthetic and functional aspects.
-
Hardwoods like oak, walnut, or mahogany are popular choices for their durability and natural beauty. However, they can be more challenging to curve.
-
Alternatively, plywood or laminated veneers offer greater flexibility and ease of manipulation.
Choose the wood that best suits your needs and preferences while considering how it will interact with the curve.
Safety Precautions For Making Curved Wood Arches
Safety should always be a priority when working with tools and materials.
* Before beginning any woodworking project, protect yourself with safety goggles and gloves. These will shield your eyes from flying debris and your hands from potential cuts or splinters.
* Additionally, be cautious when using power tools such as jigsaws or bandsaws and ensure they are operated correctly.
* Take your time and work steadily to prevent accidents and injuries.
Remember to always prioritize safety when working with tools.
Finishing And Maintenance Of Curved Wood Arches
To enhance the beauty and durability of your curved wood arch, consider applying wood finishes or stains. These will protect the wood from moisture, prevent warping or drying, and add a polished look. Regular maintenance is necessary to check for stress or wear on the arch. Proper sealing or finishing of the wood can greatly reduce the risk of moisture absorption and minimize any potential warping or drying issues.
It is important to note that wood naturally expands and contracts due to changes in humidity. Therefore, design your arch in a way that allows for this movement to prevent cracking or splitting. If the arch does experience shape irregularities, techniques such as moistening or steam bending can be employed to correct them. By following these finishing and maintenance practices, your curved wood arch will not only be aesthetically pleasing but also structurally sound and long-lasting.
Frequently Asked Questions
How do you curve wood easily?
One way to easily curve wood is by using the steam bending technique. By exposing the wood to steam, it becomes more flexible and easier to manipulate. Once the wood is pliable, it can be bent to the desired shape and secured in a mold until it cools and dries. This method allows for precise and controlled curved wood designs.
Another technique that can be used to curve wood is laminating. By layering thin strips of wood with glue and clamping them together, you can create a curved shape. As the glue dries, the wood strips bond together, forming a sturdy and beautifully curved structure. This method provides versatility in shaping wood, allowing for various curvatures to be achieved.
1. What are the necessary tools and materials needed to make a curved wooden arch?
The necessary tools and materials needed to make a curved wooden arch include a density board or plywood, a saw, a tape measure, a pencil, wood glue, clamps, and sandpaper. Additionally, a jigsaw or coping saw may be required to cut out the desired shape of the arch. It is important to have a template or drawing of the desired curve to guide the cutting process accurately. Once the arch shape is cut out, the pieces can be glued together using wood glue and secured with clamps until the glue dries. The final step involves sanding the arch to ensure a smooth finish.
2. What are some tips and techniques for bending the wooden pieces to create a curved arch?
To bend wooden pieces and create a curved arch, there are a few tips and techniques that can be useful. First, you can soak the wood in water overnight to make it more pliable. This softens the fibers, making it easier to bend. Heating the wood is another effective technique. By using steam or a heat gun, you can warm the wood and then shape it into the desired curve. This method is particularly effective for thinner pieces of wood. Additionally, using clamps or weights to hold the wood in the desired shape while it dries can help the curve to set and remain in place once the wood has dried.
3. Are there any specific safety precautions that should be taken when making a curved wooden arch?
Yes, there are specific safety precautions that should be taken when making a curved wooden arch. Firstly, it is important to wear appropriate personal protective equipment such as safety goggles, gloves, and a dust mask to protect against any potential flying debris or sawdust. Secondly, proper tools and equipment should be used, including a quality saw with a sharp blade designed for cutting curves, as well as clamps and jigs to secure the wood in place safely. It is also important to work in a well-ventilated area and to follow proper woodworking techniques to avoid accidents and injuries.