How to Cut Trim on Wall
To cut trim on a wall, you will need a few tools.
First, put on safety glasses and a dust mask to protect yourself.
Measure and mark the trim with a pencil and use a level to ensure it is straight.
Lay a drop cloth to catch any debris.
Use a ladder if needed to reach higher areas.
Secure the trim with caulk or wood putty.
Use a hammer and finishing nails or a pneumatic nailer to attach the trim to the wall.
Set the nails with a nail set.
For angled cuts, use a miter box and handsaw or a power miter saw.
For joining molding, use a coping saw.
To determine precise angles, use an angle gauge or adjustable protractor.
Fill any gaps behind crown molding with an angled filler strip.
Lubricate the saw blade with spray furniture polish.
Lastly, use an oscillating multi-tool, speed square, or crowbar when necessary.
Check this out:
Did You Know?
1. The term “trim” originally referred to decorative wooden moldings used to conceal rough edges and joints in traditional carpentry.
2. Trim on wall can be made from a variety of materials including wood, polyurethane foam, and MDF (medium-density fiberboard).
3. In the 18th century, elaborate and ornate plaster moldings were popular as decorative trim on walls in high-end homes.
4. The first power-operated miter saw, a tool commonly used for cutting trim, was patented in 1939 by Ed Niehaus. It revolutionized the process of trim installation.
5. When using a miter saw to cut trim on a wall, a technique called “back-cutting” is often used to ensure tight and seamless corner joints.
Basic Safety Gear
When it comes to any type of construction or DIY project, safety should always be the top priority. Before you even begin cutting trim on walls, make sure you have the following basic safety gear:
-
Safety glasses: Wear safety glasses to protect your eyes from flying debris. Cutting trim involves using sharp tools, and even a small piece of trim can cause serious eye injuries if it enters your eye.
-
Dust mask: A dust mask is essential to prevent inhalation of fine particles and dust created during the cutting process. Some trim materials, such as MDF or composite, can release harmful chemicals when cut, so wearing a mask is crucial.
Measuring And Marking Tools
To achieve a perfect fit along the wall when cutting trim, accurate measurements and markings are crucial. The following tools will help you achieve precise results:
-
Tape Measure: Start by choosing a reliable tape measure with clear markings and a locking mechanism to secure measurements. Use it to measure the length of the wall where the trim will be installed.
-
Pencil: It is essential to have a pencil for marking the trim and the wall. Opt for a carpenter’s pencil as it has a flat edge that ensures accurate lines and doesn’t easily roll away.
-
Level: A level is crucial to ensuring that your trim is straight. Place it against the wall and adjust the trim accordingly to achieve a level installation.
-
Use a tape measure with clear markings and a locking mechanism.
- Opt for a carpenter’s pencil for accurate lines.
- Utilize a level to ensure the trim is straight.
Remember that accurate measurements and precise markings are essential for a flawless trim installation.
Tools For Nail And Screw Installation
To secure the trim to the wall, you’ll need a few tools for nail and screw installation:
-
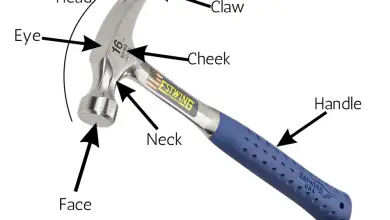
A hammer is a standard tool for driving nails into the wall. Use it to gently tap finishing nails into the trim, ensuring a flush fit.
-
A power drill, along with appropriate drill bits, can be used to pre-drill pilot holes in hardwood trim to prevent splitting when nails or screws are driven in.
-
For faster and more efficient installation, a pneumatic nailer is highly recommended. It uses compressed air to drive nails into the trim with minimal effort.
-
A nail set allows you to sink the nails below the surface of the trim, creating a seamless appearance.
Cutting Tools
Trim often needs to be cut to fit specific lengths or angles. The cutting tools listed below will help you achieve precise cuts:
-
A circular saw is a versatile cutting tool that can quickly and accurately cut through different trim materials. Ensure the blade is sharp and suitable for the material you are cutting.
-
A coping saw is useful for joinery work, particularly for intricate cuts around corners or irregular shapes. It allows you to create a smooth and seamless joint when installing molding.
-
For precise 45- or 90-degree angle cuts, a miter box and handsaw are suitable options. The miter box acts as a guide to ensure accurate cuts, and the handsaw provides control and precision.
-
If you need to determine wall angles precisely, an angle gauge or 360-degree adjustable protractor is necessary. This tool allows you to measure and replicate the angle of the wall, ensuring a perfect fit for the trim.
-
For more complex angle adjustments, such as compound miter cuts, a power miter or compound miter saw is highly recommended. These saws have adjustable features that allow for precise and accurate cutting.
Specialized Tools For Joining And Angles
-
An angled filler strip is used to fill the space behind crown molding, creating a seamless and professional appearance. This tool ensures that your trim fits snugly against the wall.
-
A spray furniture polish may seem unusual, but it serves as a lubricant for the saw blade, reducing friction and allowing for smoother cuts.
-
An oscillating multi-tool is a versatile tool for various cutting tasks such as undercutting trim and making precise cuts in tight spaces. It can also be used for removing old caulk or adhesives.
-
A speed square is a useful tool for marking 90-degree angles and measuring short distances. It is handy for quick measurements and ensuring accurate cuts.
-
A crowbar is useful for removing old trim or adjusting trim that isn’t fitting properly. Use it with care to avoid damaging the wall.
Miscellaneous Tools
Lastly, a few miscellaneous tools can be handy during the trim-cutting process:
-
A drop cloth is essential to protect the floor and furniture from dust, debris, and potential damage from heavy tools.
-
A ladder is necessary for reaching high areas when installing trim. Choose a stable and sturdy ladder to ensure safety.
-
Caulk or wood putty is used to fill nail holes or cover gaps between the trim and the wall. It creates a seamless finish and enhances the overall appearance of the trim installation.
With these tools at hand, you are well-equipped to cut trim on walls like a professional. Remember to prioritize safety and take your time to ensure accurate measurements and clean cuts. Happy trimming!
Frequently Asked Questions
What tool is used to cut trim with?
A highly efficient tool for cutting trim is the power miter or compound miter saw. These saws offer greater versatility as they allow for adjustments in both angles – the miter and the bevel. Opting for a saw with a carbide saw blade that includes 80 teeth or more ensures precise and clean cuts. Additionally, it is crucial to ensure that the saw is perfectly square, and the table angle gauge is accurate to achieve accurate and professional results when working with trim.
What is the best material for wall trim?
When it comes to choosing the best material for wall trim, it ultimately depends on your specific needs and preferences. If durability and solidity are your main concerns, natural wood would be the ideal choice. Its strength and durability surpass those of both plastic and MDF. On the other hand, if moisture-resistance is a priority, polyurethane trim would be the better option. It provides better protection against humidity and water damage. However, if you desire a natural wood aesthetic with a clear-coat or stained finish, opting for natural wood, like hemlock, would be the most suitable choice.
What saw is best for wall trim?
When it comes to wall trim, a compound miter saw proves to be the best choice. This type of saw not only allows for accurately measured angle cuts with its gauge, but also enables precise bevel cuts at different angles by tilting the saw blade. With its versatility and precision, a compound miter saw ensures that your wall trim will fit seamlessly and add a polished touch to any room.
What are some tips for achieving clean and precise cuts when cutting trim on a wall?
To achieve clean and precise cuts when cutting trim on a wall, there are a few helpful tips to keep in mind. Firstly, it’s crucial to use the right tools for the job. A miter saw or a miter box with a hand saw is commonly used to make accurate angled cuts. Make sure your saw is sharp and properly adjusted to ensure smooth and precise cuts.
Secondly, it’s important to measure and mark the trim accurately before cutting. Use a tape measure and a pencil to mark the desired length and angles on the trim. Double-check your measurements to avoid any errors.
Lastly, take your time and make slow, deliberate cuts. Rushing can lead to mistakes, so it’s better to work slowly and steadily. Additionally, using a backer board or tape on the surface of the trim can help prevent any splintering or damage during the cutting process.