How to Bake Pottery
To bake pottery, there are a few essential steps that need to be followed.
First, it is crucial to choose the right type of clay and prepare it properly.
Then, shape and form the clay into the desired object and let it air dry completely.
Afterward, the pottery needs to be fired in a kiln at a specific temperature.
Finally, the piece should be cooled gradually to prevent cracking.
These steps ensure that the pottery is properly baked and achieves its desired strength and durability.
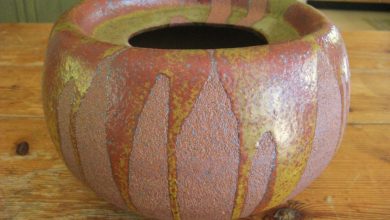
Check this out:
Did You Know?
1. The word pottery is derived from the Old French word “poterie,” which means “potter’s workshop.”
2. The oldest known pottery fragments were found in China and date back to approximately 20,000 years ago.
3. During the Neolithic period, pottery was often used as a means of measuring time. By creating pottery vessels with precise shapes and sizes, ancient civilizations were able to determine the passage of time based on the drying and firing process of the clay.
4. In ancient Egypt, pottery played a significant role in the afterlife. Elaborate burial practices included placing pottery vessels filled with food and water alongside the deceased, in the belief that they would be required in the afterlife.
5. The technique of baking pottery in a kiln was first developed in Mesopotamia around 6000 BCE. Prior to this, pottery was fired using traditional open fires or by burying it in the ground.
Choosing The Right Clay
When it comes to baking pottery, it is essential to choose the right clay. There are various types of clay available, each with its own unique properties and firing temperatures. The two main categories of clay are earthenware and stoneware.
- Earthenware clay is often used for beginners as it is easier to work with and can be fired at lower temperatures.
- Stoneware clay, on the other hand, is more durable and can withstand higher firing temperatures.
After selecting the type of clay, it is important to consider its moisture content. Clay that is too moist or too dry can be challenging to manipulate and shape properly. It is recommended to purchase clay from a reputable supplier to ensure quality and consistency.
To find the clay that best suits your artistic vision and firing capabilities, it is worth experimenting with different types of clay.
- Experiment with different types of clay to find the one that suits your artistic vision and firing capabilities best.
Remember, the right clay can make a significant difference in the outcome of your pottery creations, so choose wisely.
Preparing The Pottery Wheel
Before shaping your pottery, it’s crucial to prepare the pottery wheel properly. Here are the steps to follow:
-
Clean the wheelhead: Ensure that the wheelhead is clean and free from any debris. This will help in creating a smooth surface for your clay work.
-
Center a bat: Place a bat on the wheelhead and secure it firmly. The bat will provide a stable surface for your clay.
-
Wet the bat: Slightly wetting the bat will help adhere the clay to it, preventing it from slipping or moving during the shaping process.
-
Wedging the clay: Take a piece of clay and wedging it is important. Wedging is the process of kneading the clay to eliminate air bubbles and improve its plasticity. This will ensure that the clay is consistent and easier to shape.
-
Place the clay on the bat: Once the wheel and bat are ready, place the wedged clay onto the bat in the center of the wheelhead.
-
Start the wheel: Begin the wheel at a moderate speed. This will help in stabilizing the clay.
-
Stabilize the clay: Firmly press the clay against the bat to stabilize it. This will prevent the clay from shifting or moving while you shape it.
Now, you are ready to start shaping and sculpting your pottery.
- Clean the wheelhead
- Center a bat
- Wet the bat
- Wedge the clay
- Place the clay on the bat
- Start the wheel
- Stabilize the clay
Shaping And Sculpting Techniques
Shaping and sculpting pottery on the wheel requires a delicate balance of pressure and control. Begin by wetting your hands and the clay to prevent sticking. Place both hands on the clay, with your fingertips touching the center of the clay mound and your thumbs gently pressing against the outside.
Using gentle pressure, slowly open up the center of the clay by applying even pressure with your fingertips while simultaneously pulling upward. This technique is called “centering,” and it ensures the clay is balanced on the wheel.
Once you have centered the clay, it’s time to shape it. With your hands still wet, apply pressure to the top of the clay, gently pushing outward and downward simultaneously. As the clay grows taller, cup your hands around it and continue shaping by applying pressure from the bottom. Use your fingertips to refine the shape and smooth out any imperfections.
Experiment with different shaping techniques like pulling up the walls or creating ridges and textures. The more you practice, the better you will become at controlling the clay and bringing your artistic vision to life on the pottery wheel.
Drying And Firing The Pottery
After sculpting and shaping your pottery, it is essential to let it dry thoroughly before firing it in the kiln. This drying process is known as “greenware.” Greenware can be extremely fragile, so handle it with care to avoid any accidental damage.
To dry the greenware evenly, place it in a clean, dry area with good airflow. Avoid direct sunlight or excessive heat, as this can cause uneven drying and lead to warping or cracking. It is crucial to monitor the drying process closely, as different clay types may require varying amounts of time to dry fully.
Once the greenware is completely dry, it is ready to be fired in the kiln. Follow the specific firing instructions provided by the clay manufacturer or consult with an experienced potter for guidance. Firing pottery requires precise temperature control to ensure the clay matures properly and becomes durable. Monitor the kiln’s temperature carefully throughout the firing process to avoid any mishaps.
- Place the greenware in a clean, dry area with good airflow
- Avoid direct sunlight or excessive heat to prevent warping or cracking
- Monitor the drying process closely for different clay types
- Follow specific firing instructions provided by the clay manufacturer
- Monitor the kiln’s temperature carefully throughout the firing process
Decorating And Glazing Ideas
Once the pottery has been successfully fired and cooled, it’s time to unleash your creativity through decoration and glazing techniques.
There are countless ways to adorn your pottery, ranging from simple brush strokes to intricate patterns and designs. Experiment with different paints, stains, and glazes to achieve the desired effect.
Consider using underglaze paints for intricate detailing or a natural clay slip for a more subdued look. Another popular technique is wax resist, where you apply wax before glazing to create areas of exposed clay. This results in a beautiful contrast of textures and colors.
It is crucial to let each layer of decoration or glaze dry completely before moving on to the next step.
Caring For And Displaying Your Pottery
Once you have created a masterpiece, it’s essential to take proper care of your pottery to ensure its longevity and beauty. Make sure to clean your pottery gently, using a soft cloth or brush to remove dust or dirt. Avoid harsh cleaning agents or abrasive materials that may scratch or damage the surface.
When displaying your pottery, choose a spot that showcases its unique features and complements your overall decor. Consider using display stands or shelves designed specifically for pottery to protect it from accidental falls or damage. Avoid exposing your pottery to direct sunlight or extreme temperature changes, as these can cause fading or cracking over time.
With proper care, your pottery can become a cherished piece of art that brings joy and beauty to your daily life. Embrace the art of baking pottery, and enjoy the satisfaction of creating unique, handmade pieces that will be admired for years to come.
Frequently Asked Questions
Can you bake pottery in a regular oven?
It is not advisable to bake pottery in a regular kitchen oven due to safety concerns. The temperatures required to properly fire clay, typically reaching 1,000 degrees Fahrenheit and higher, cannot be achieved in a regular oven. Attempting to do so may cause a house fire and result in significant risks. Consequently, it is crucial to utilize appropriate equipment and kilns specifically designed for pottery firing to ensure both safety and successful outcomes.
How do you bake pottery at home?
To bake pottery at home, a feasible method involves utilizing a kiln alternative. A kiln can be improvised by placing the pottery pieces in a sealed metal container, such as a steel box or a paint can, and surrounding them with sawdust or baking soda. Igniting the sawdust or baking soda will create a controlled environment for the pottery to bake. The container can then be heated on a stovetop or in an outdoor fire pit until the desired temperature is reached, allowing the pottery to dry thoroughly and the clay particles to bond. Cautious monitoring is crucial to ensure consistent heat distribution and prevent any potential mishaps during the process.
What is the process of baking pottery?
The process of baking pottery involves a series of steps to transform raw materials into durable and functional objects. It begins by combining clay, earthen minerals, and water, which are then shaped into desired forms using various techniques like hand-building or wheel throwing. After shaping, the pottery undergoes a drying process to remove moisture and prepare it for firing. Once dry, the clay body is placed in a kiln and subjected to high temperatures, typically ranging from 1,000 to 1,200 degrees Celsius. This firing process serves to harden the clay, removing any remaining moisture and organic materials, and it chemically transforms the minerals in the clay so that the pottery becomes heat resistant and durable. Finally, the kiln is cooled gradually, and the baked pottery is carefully removed, ready to be glazed or used as it is.
Can pottery clay be baked in a regular oven?
Pottery clay, also known as natural clay, cannot be baked in a regular oven. Since natural clays require high firing temperatures, a regular oven cannot reach or sustain the necessary heat levels. Kilns are specifically designed to reach extremely high temperatures, making them the ideal choice for firing pottery clay. On the other hand, polymer clay, a different type of clay, can be easily baked at home in a conventional oven. Polymer clay has a lower firing temperature, allowing it to cure and harden when exposed to the heat of a regular oven.